
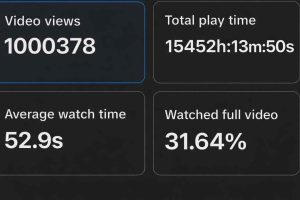
1 million views. 15,000 hours of watch time. 30 days. Zero prior following.
I built an AI storytelling TikTok channel from scratch; no audience, no budget, no guarantee it would work. And the results genuinely surprised me.
Here’s my step by step guide on how to go about it.
Step 1: Choose Your Niche
Before you generate a single image or animate a single scene, you need to decide what kind of stories your channel will tell. This decision matters more than most beginners realize.
The niche you choose will influence your scripts, visuals, audience, and even how fast your videos start going viral.
Some popular niches include:
-
Dialogue-based drama (characters speaking to each other)
-
Story narration (an AI voice narrates the story over visuals)
-
Suspense and thriller stories
-
African village or cultural stories
-
American-style relationship drama
Each of these can work well if executed properly.
If you are not sure which niche to choose, that is completely normal. Many creators get stuck at this stage because they feel they need the perfect idea before they begin.
This is where tools like ChatGPT can help.
Open ChatGPT and try a prompt like this:
“I want to start an AI storytelling channel. Give me the top 10 content niches I could focus on.”
ChatGPT will instantly generate several ideas you can explore. Pick one that interests you, or keep refining the suggestions until something clicks.
The goal here is simple: choose one direction and start creating. You can always refine your niche later as you learn what your audience enjoys.
Step 2: Generate Your Story Script
Now that you have chosen your niche, you need the most important ingredient: a story.
Many beginners assume this means spending hours trying to come up with the perfect script.
But here is something interesting I noticed while studying successful AI storytelling channels. The stories that perform best are usually simple, emotional, and easy to follow. They often revolve around conflict, tension, or an unexpected twist.
Let’s look at a quick example.
Imagine a story like this:
A woman opens her brand-new shop, excited for her first day of business. But within minutes, robbers walk in.
That single idea already contains tension and curiosity, which makes people want to keep watching.
This is where ChatGPT becomes incredibly useful.
You can pitch your story idea to ChatGPT and ask it to turn the concept into a full script.
For example, you could prompt it like this:
“Write a short dramatic story for an AI storytelling video about a woman opening a new shop when robbers suddenly arrive.”
If the first version doesn’t feel right, simply ask:
“Give me another version.”
One of the advantages of ChatGPT is that it can generate endless variations until you find a story that feels engaging.
Once you have a script you like, you can take it one step further.
Step 3: Create Your Voice Narration
Now that you have your script, the next step is turning that text into a natural-sounding voice.
This is the narration that will guide viewers through your story, so choosing a good voice matters more than many beginners realize.
Fortunately, you don’t need to record anything yourself. AI voice generators can convert your script into realistic narration in seconds.
Two tools I recommend are ElevenLabs and MiniMax.
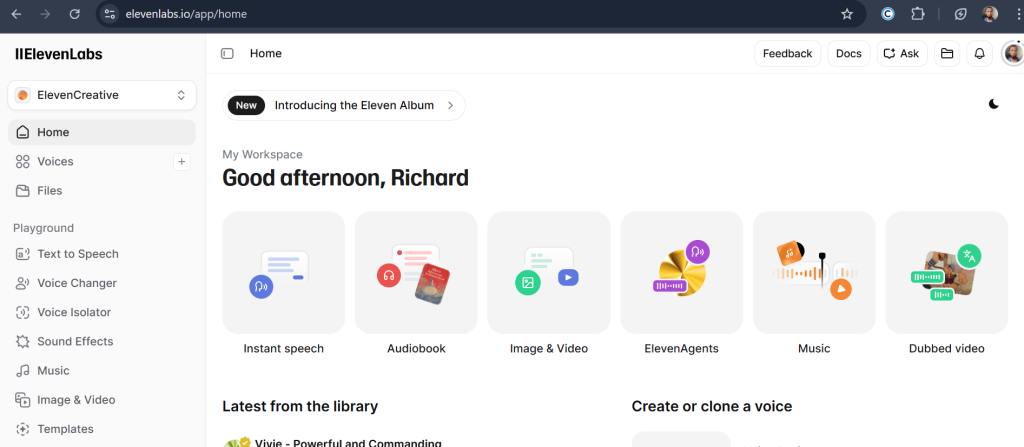
Both platforms allow you to paste your script and generate high-quality voiceovers with different tones and speaking styles.
Start by copying your final script from ChatGPT.
Then open ElevenLabs or MiniMax and paste the script into the text-to-speech generator. Browse through the available voices and pick one that matches the tone of your story.
For example:
-
A calm narrator works well for emotional storytelling.
-
A deeper voice can add tension to thriller stories.
-
A softer voice can make relationship stories feel more personal.
Generate the voiceover and listen to it once before downloading. If something sounds off, you can easily tweak the script or try a different voice. But try to keep narration sentences short so they match the length of your animated scenes
Once you’re happy with the result, export the audio file and save it with your project files.
This narration will later be placed underneath your animated scenes in CapCut, helping the visuals and story flow together smoothly.
With your narration ready, it’s time to move on to the visual side of your story.
Step 6: Animate Your Scenes with Grok
Up to this point, you have been creating the building blocks of your story: the script, the characters, and the images.
Now comes the stage where everything starts to move.
To animate the images, I use Grok, which can turn a still image into a short video clip with motion and dialogue.
Start by downloading the Grok app or opening the website and signing in with your Gmail account. The mobile app tends to run a little smoother if you’re working from your phone.
Before generating anything, make sure to disable auto-generation. This is important because auto-generation can quickly burn through your free credits.
Next, choose the video format that matches where you plan to post your content. If you’re creating videos for TikTok or YouTube Shorts, portrait format works best. If you’re targeting YouTube long-form videos, landscape is usually the better choice.
Once everything is set up, begin animating your scenes.
Upload the image you generated for a scene, select the Animate option, and paste the video prompt that ChatGPT created earlier. Grok will process the image and generate a short animated clip.
If the result doesn’t look right, simply regenerate it until you get a version you’re happy with.
The free tier usually generates clips of around six seconds, and you can create roughly twenty videos per account within a 24-hour period.
Once all your scenes are animated, you’re ready for the final stage: assembling the story.
Step 7: Assemble the Story in CapCut
With all your clips generated, the final step is putting everything together into a single video.
For this stage, I use CapCut, which is one of the easiest editors for beginners.
Import all your clips into CapCut and arrange them in order according to your scene numbers. Import the voiceover you saved earlier from Step 3 and place it under the video clips. From there, you can trim any unnecessary moments, adjust the pacing, and add any final touches.
But before you export the video, there is one detail that can make or break your content.
Your opening hook.
Many beginners start their video at the beginning of the story. Unfortunately, that’s often the slowest part, and on platforms like TikTok or Shorts, viewers decide whether to keep watching in the first few seconds.
Instead, start with the most gripping moment.
Using our shop robbery example, instead of opening with something like:
“Maria had always dreamed of owning her own business.”
You could begin with something more intriguing:
“Not every blessing comes without a cost.”
It’s short, mysterious, and it immediately raises questions in the viewer’s mind.
You can write these hooks yourself or ask ChatGPT to generate a few options. The goal is simply to give viewers a reason not to scroll away.
Once your clips are arranged and your hook is in place, export the video, and your AI storytelling content is ready to post.
It’s Easier Than You Think
And those are all the steps I took to take my TikTok account from 0 to 1 million views and to monetization with the Creators Reward Program in just one month.
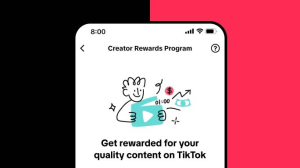
Source – TikTok
As a recap, here are the needed tools again, and the workflows:
ChatGPT → Build your story and prompts
ElevenLabs/ Minimax → Generate your voiceovers
Flow AI → Generate character images
Grok → Animate the images
CapCut → Assemble the video and voice
Post → Repeat.
It might seem complicated at first, but trust me, it’s not that hard. If you stay consistent, posting at least 1-2 videos every day, you’ll get faster, your prompts will get better, and your faceless channel will start to grow.
If you are stuck and need assistance at any point, you can always reach out.

Richard Anthony is a veteran tech writer focused on the practical side of AI. He reviews software, solves technical problems, and writes guides to help you navigate the fast-moving world of artificial intelligence. His goal is to provide clear, actionable advice without the jargon.
